![]()
At my last my job, I was involved in an Azure tenant migration that was initiated by a company merger. As a part of this migration, I was given the task of migrating some servers to the new tenant. The other resources were rebuilt in the new environment, however these particular machines had complex configurations that made rebuilding them very time consuming. In this article, I will document the steps I took to move the VMs to the new tenant using Azure Storage Explorer.
Azure Storage Explorer is a free graphical utility that allows you to connect to an Azure account to view and manage storage resources across subscriptions and tenants from your local machine. I won’t go through the steps of setting up Azure Storage Explorer but the tool can be downloaded here.
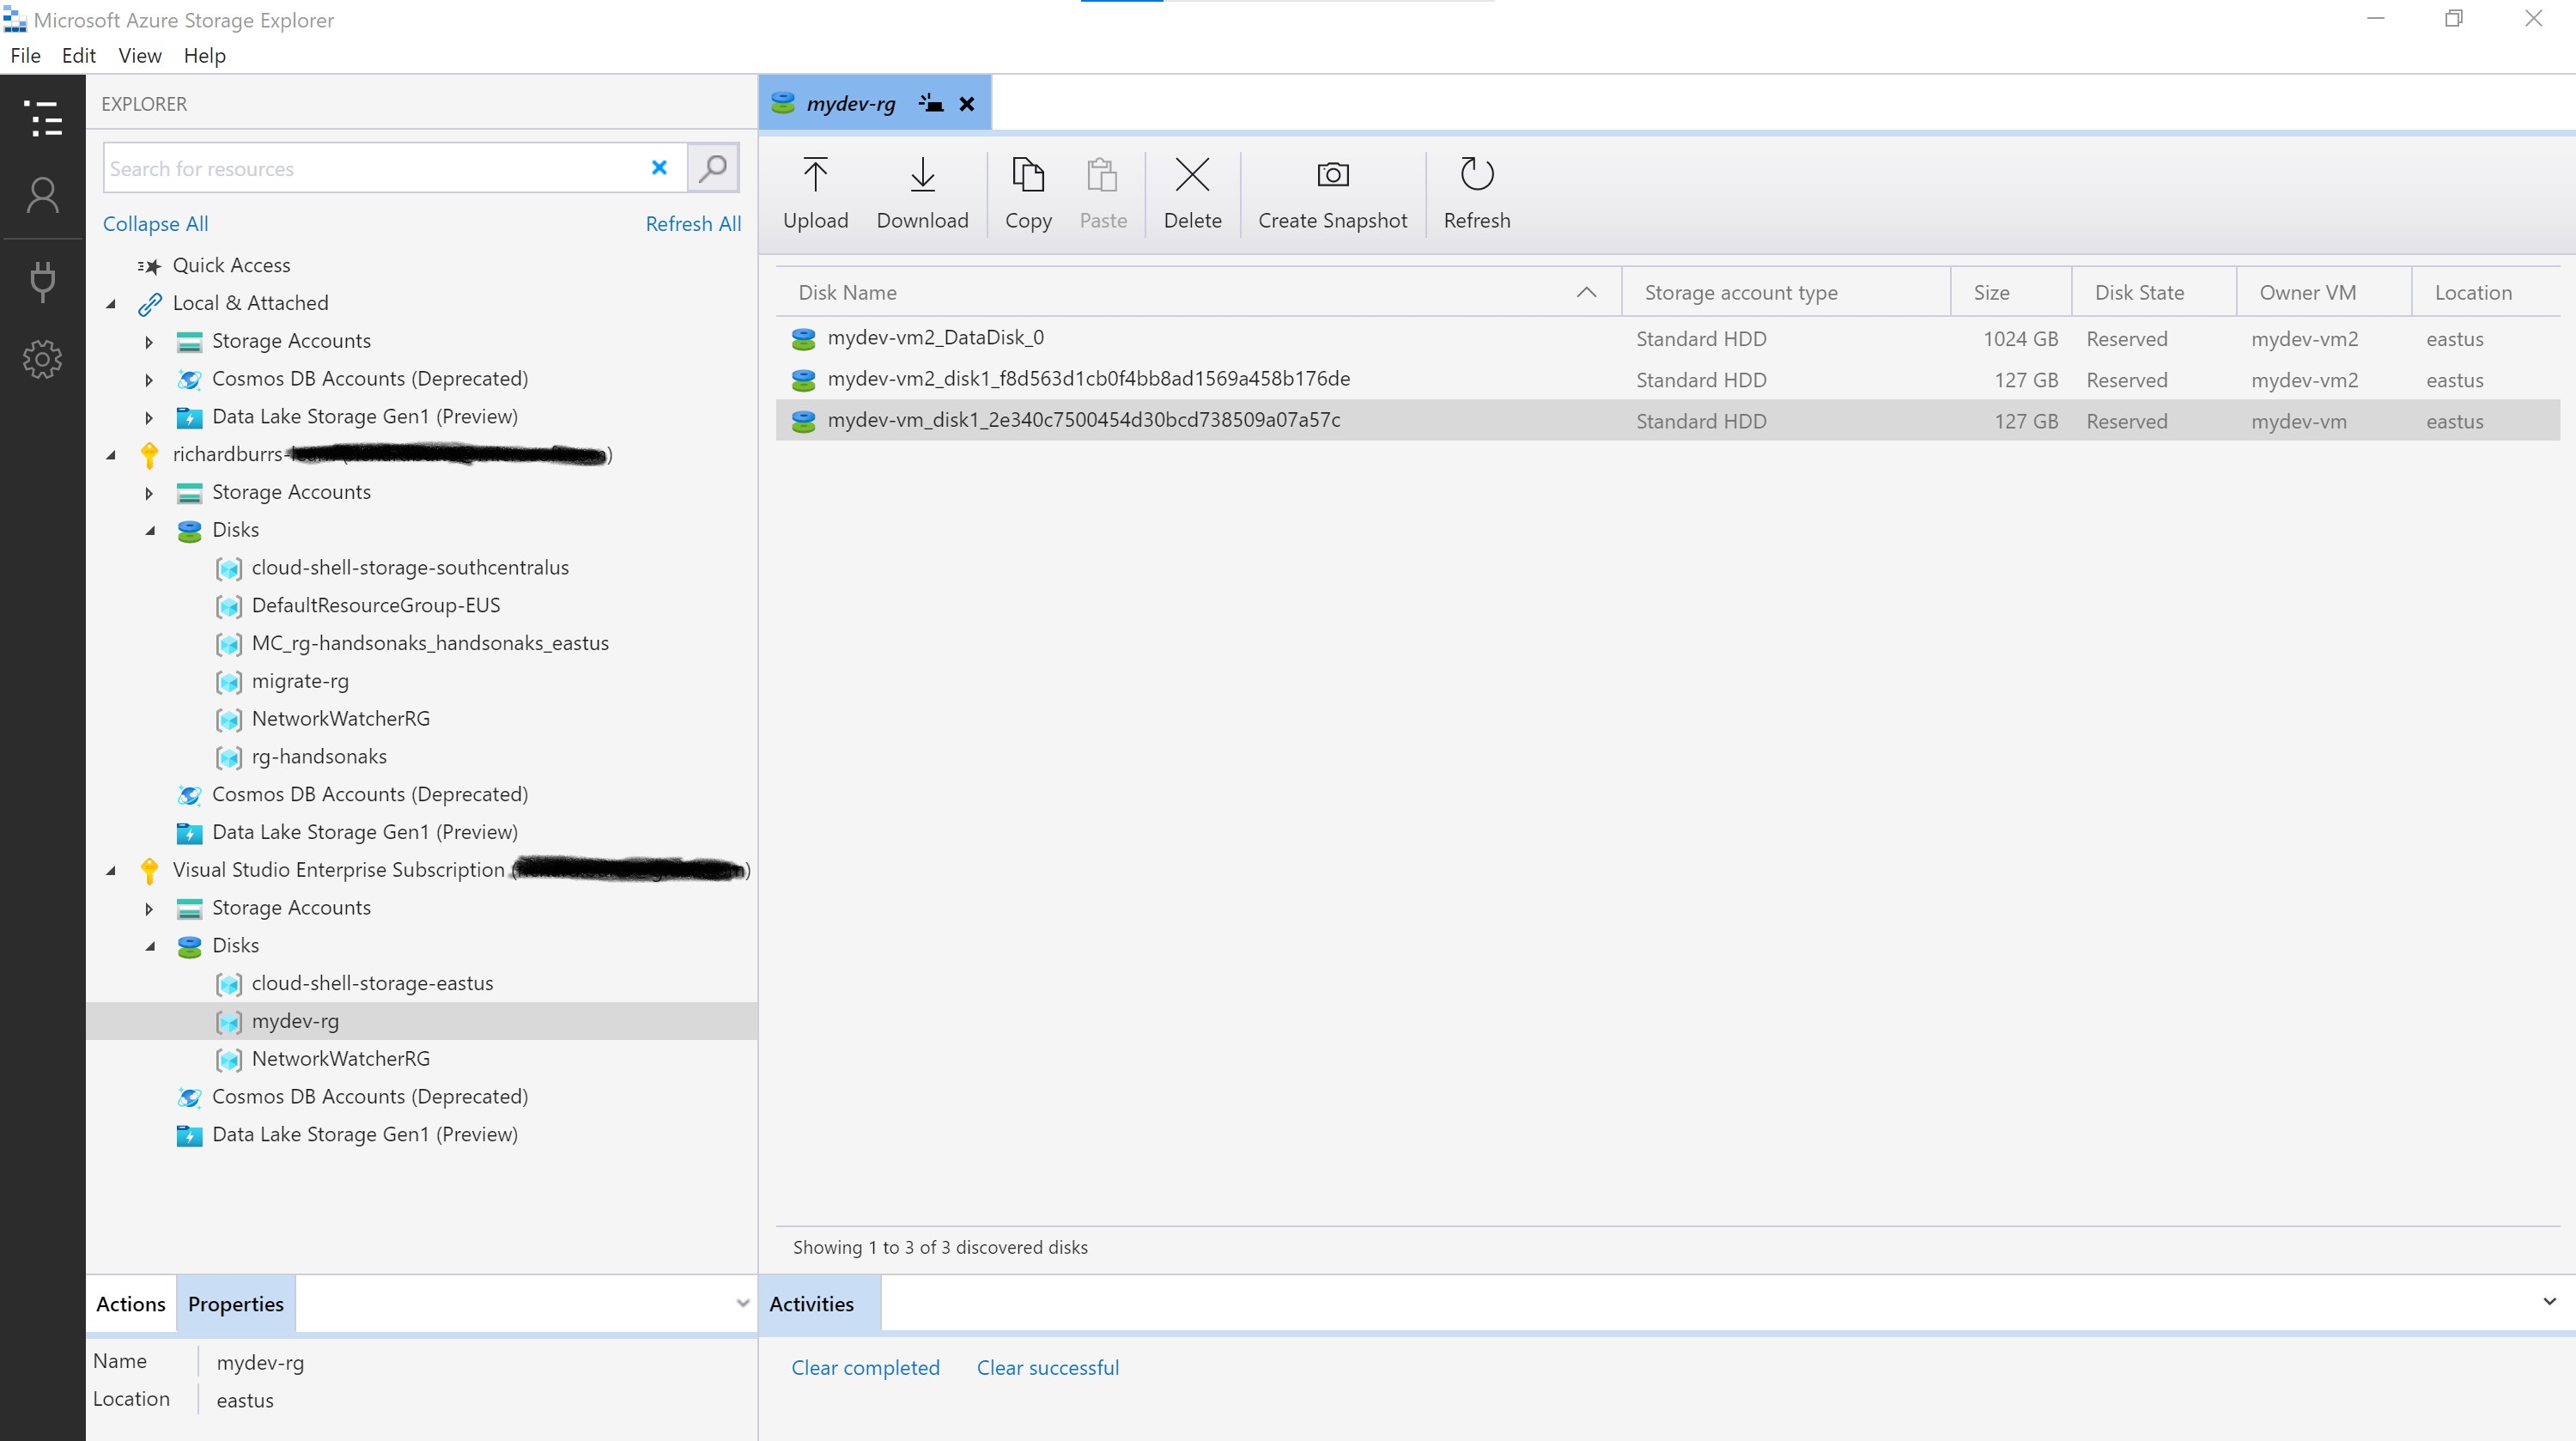
Once you have installed Storage Explorer and added your subscriptions, it should look something like this:

I’ve added two subscriptions that are from different tenants. In this case, I have a VM in the “Visual Studio Enterprise” subscription that I will move to the subscription called “richardburrs”. The resources that appear in these examples no longer exist.
Before proceeding with the VM migration process, make sure the target VM is stopped. The first step in Storage Explorer is to navigate to the disk that is associated with the VM that will be migrated. In this case, the source disk is located in the “mydev-rg” Resource Group under the Visual Studio Enterprise subscription. Once there, select the disk to be copied and then click on the “Copy” button as seen below.
Next, navigate to the resource group in the target tenant that will contain the new VM. In this case, I’m choosing the “migrate-rg” Resource Group under the “richardburrs” subscription. Again, this subscription is in a different tenant. Click the “Paste” button at the top of the window pane on the right, as seen below.

A window will open to provide information for the disk that will be copied. Fill out the information for the disk name, region, availability zones and type. Once you’re done, click “Paste”.

The process of moving or pasting the disk will start. As you can see below, there’s a progress indicator that shows the transfer rate and percentage complete. The transfer is very fast and increases over time. For example, this disk is 127 GB and took approximately 5 minutes to copy. The reason for the fast copying is because this process is being done on the Azure backbone.

Once the copy is complete, the disk will appear in the new location as you can see below.

The final step is create a new VM using the migrated disk. To accomplish this task, log into the Azure portal using the account associated with the target tenant. Next, search for Disks and then select the one that was migrated. Click on the button at the top of Disk page that says “Create VM” to bring up the VM creation page.

If you’ve never create a VM in the Azure portal, here are two Microsoft docs that explain how to create a Windows VM and Linux VM. I won’t outline all of the steps of creating the VM. However, make sure that the image field shows the disk. It will place it there for you, as you can see below.
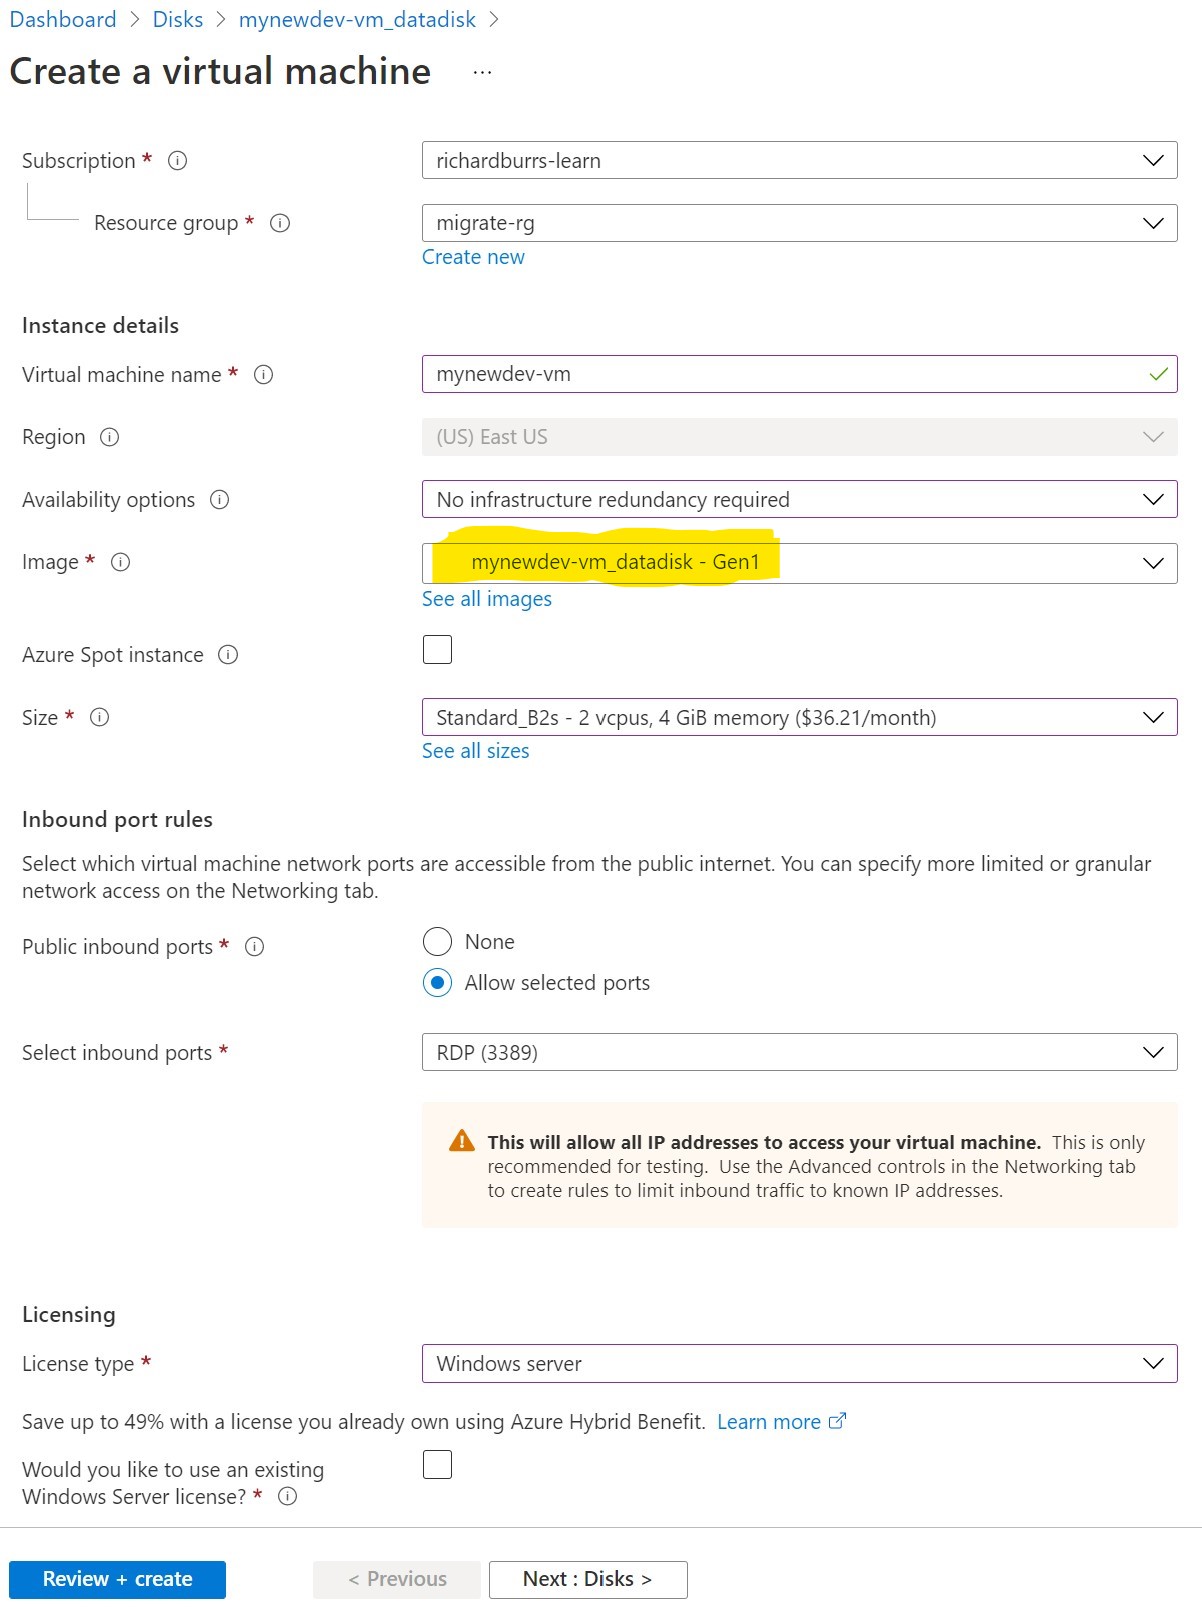
Also, you won’t get an option to create a username and password if one was created previously. The credentials will be detected in the user accounts store on the disk. Once you’ve completed all of the configuration steps, create the VM to complete the process. Any installed applications and stored data on the source VM will be available on the newly created VM.
This example involved a VM with a single disk. If there’s an additional data disk attached to the original VM, the process in general will be the same. In that case, you will copy and paste both the O/S and data disk in Azure Storage Explorer. You will then create the new VM with the O/S disk and attach the existing data disk under the “Disks” section in the VM creation wizard.
In summary, I demonstrated how you can move a VM in Azure to another tenant when using Azure Storage Explorer. This tool allows you to copy and transfer the disk of a VM to another tenant and rebuild a new VM with the copied disk. This is a very fast, simple and efficient process that’s great for time-sensitive projects that involve the migration of Azure VMs to another tenant.

Hi Richard,
1. What is the effect if the disks are encrypted in the Source Tenant? Do I have to unencrypt first?
2. Can I still use the original “source server”; after I made a copy to the new Tenant?
LikeLike
This process works with encrypted disks.
LikeLike
Thank very much. Struggled on get over a snapshot over to the other tenant. guess the simplest way is to create a disk. Thanks very much once again.
LikeLiked by 1 person
You’re welcome!
LikeLike
I have similar user case for DB server hosted in Azure.Now want to move other subscription in different tenant .could you please help any possible way.Thanks
LikeLike
This is great! Thank you very much.
Does this method move the disk, or does it simply copy it across?
LikeLike
Hi Micah,
This is a copy operation.
LikeLike
What could be the cost of moving a 30GB disk, for example? both for the source subscription and the destination subscription?
LikeLike
Hi – we need to move some VM’s and disks from one tenant to another, the “moved” VM will need to be connected to a new domain, is there a way to do this or is it a case of doing as above and moving the disk then re-creating the VM in the new tenant?
Thanks
LikeLike
Hey, for this scenario you will need to move the disk, recreate the VM and then join it to the domain.
LikeLike