
In this article, I will show you how to prevent the creation of all resources in Azure. You may be thinking, “Why on Earth or any other planet would anyone want to do that”? Good question! While working on a tenant migration, I was given the task of freezing the creation of new resources in the legacy environment until the migration was complete. Here’s how I accomplished that task using Azure Policy.
The are a number of built-in policies within Azure. I found two that were close to what I needed: Allowed resource types and Not allowed resource types. As you may have guessed, the “Allowed resource types” policy allows you to specify which resources are allowed. And the “Not allowed resource types” policy gives you the ability to specify which resources cannot be created. The “Not allowed policy” is more suited for what I was trying to accomplish, however a limitation with it is the requirement to individually select resources from a list of hundreds. Also, there is no option to select all. Obviously that won’t work, as my patience is not unlimited. As a result, I decided to duplicate the policy and make a small change to its definition JSON code.
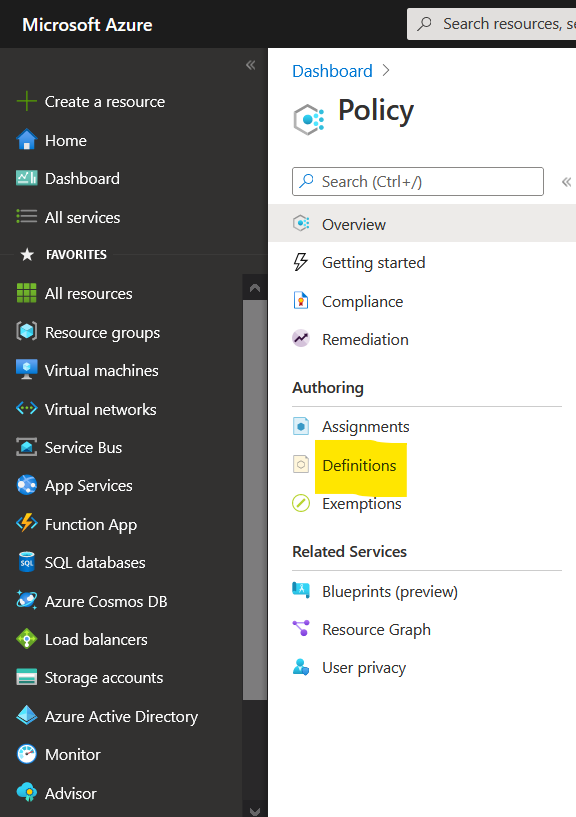
Here’s how to duplicate the policy. In the Azure Portal, search for Policy. After you select Policy, click on Definitions in the sidebar under Authoring.
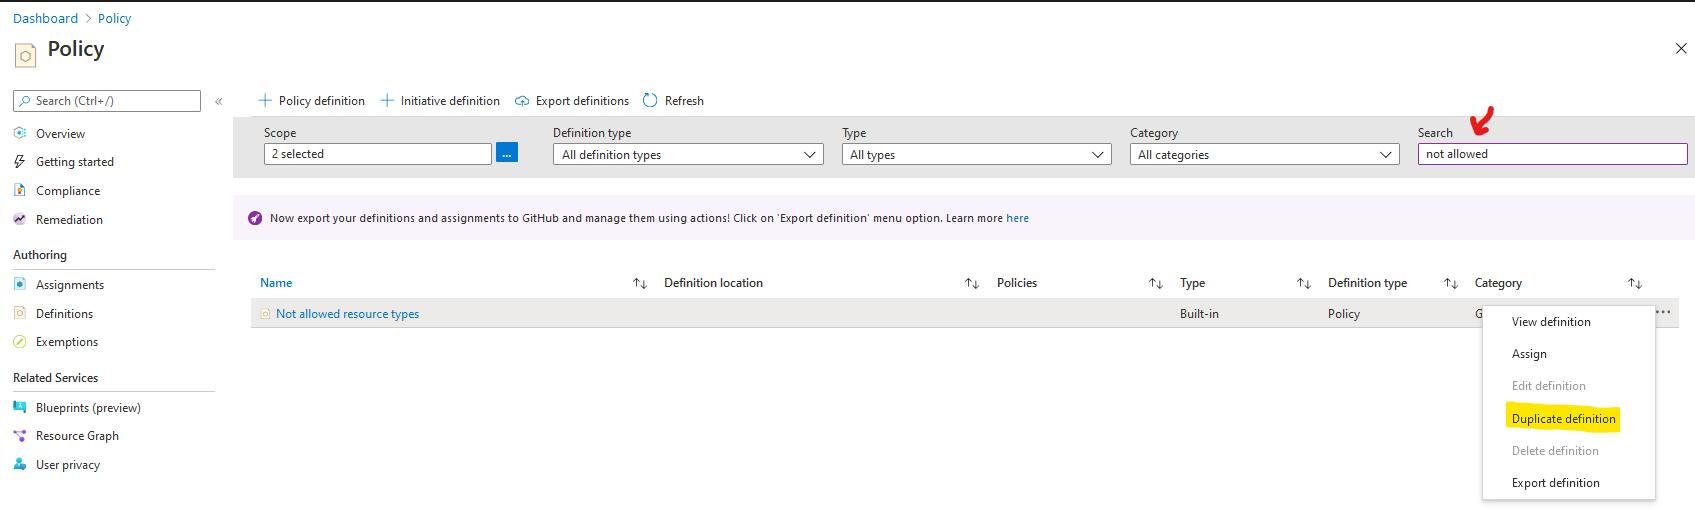
On the Definitions page search for the “Not allowed resource types” policy and click on the ellipses next to the policy to select “Duplicate definition”. This is where you will make the necessary changes to the default policy definition.
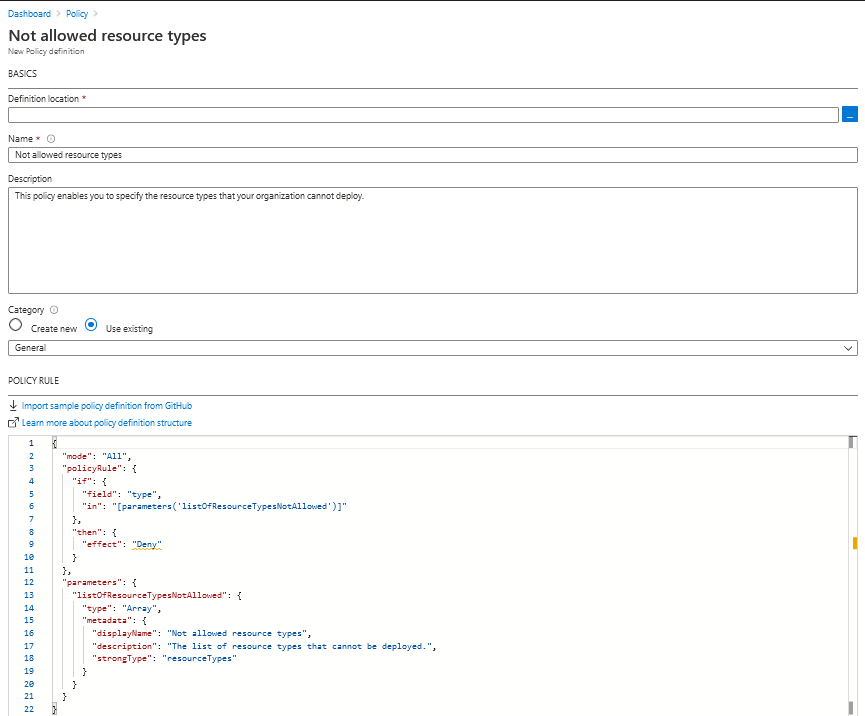
As you can see, the policy has a parameter that allows you to determine which resources to deny. Since we’ll be denying all resources in this case, the parameter isn’t needed.
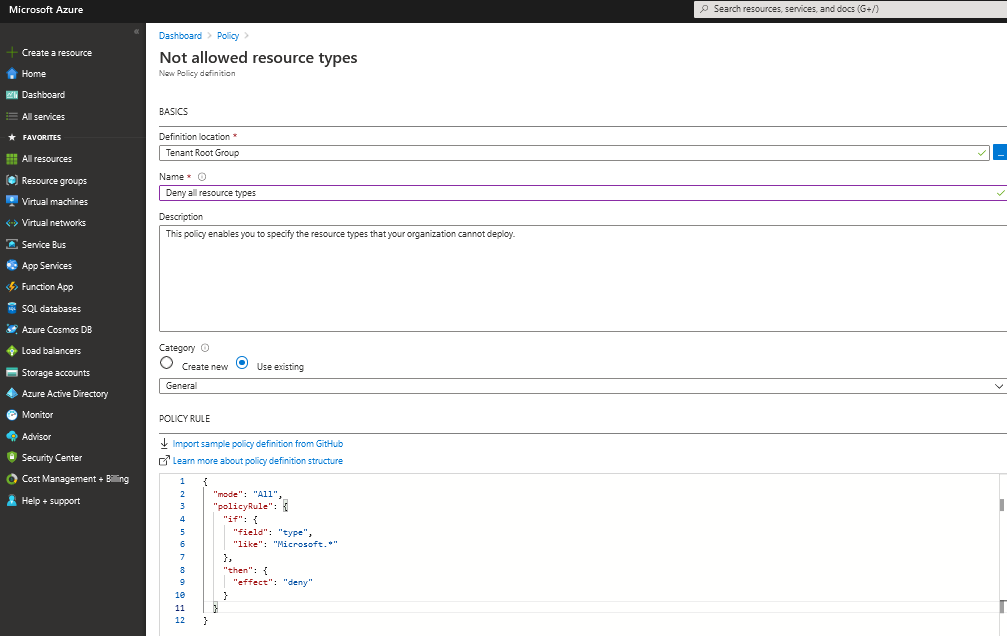
The edited definition, shown below, will have a deny action on all resources like type “Microsoft.*”. After the change is made and other options are selected (location, name, category), save the new policy definition. I named this policy “Deny all resource types”.
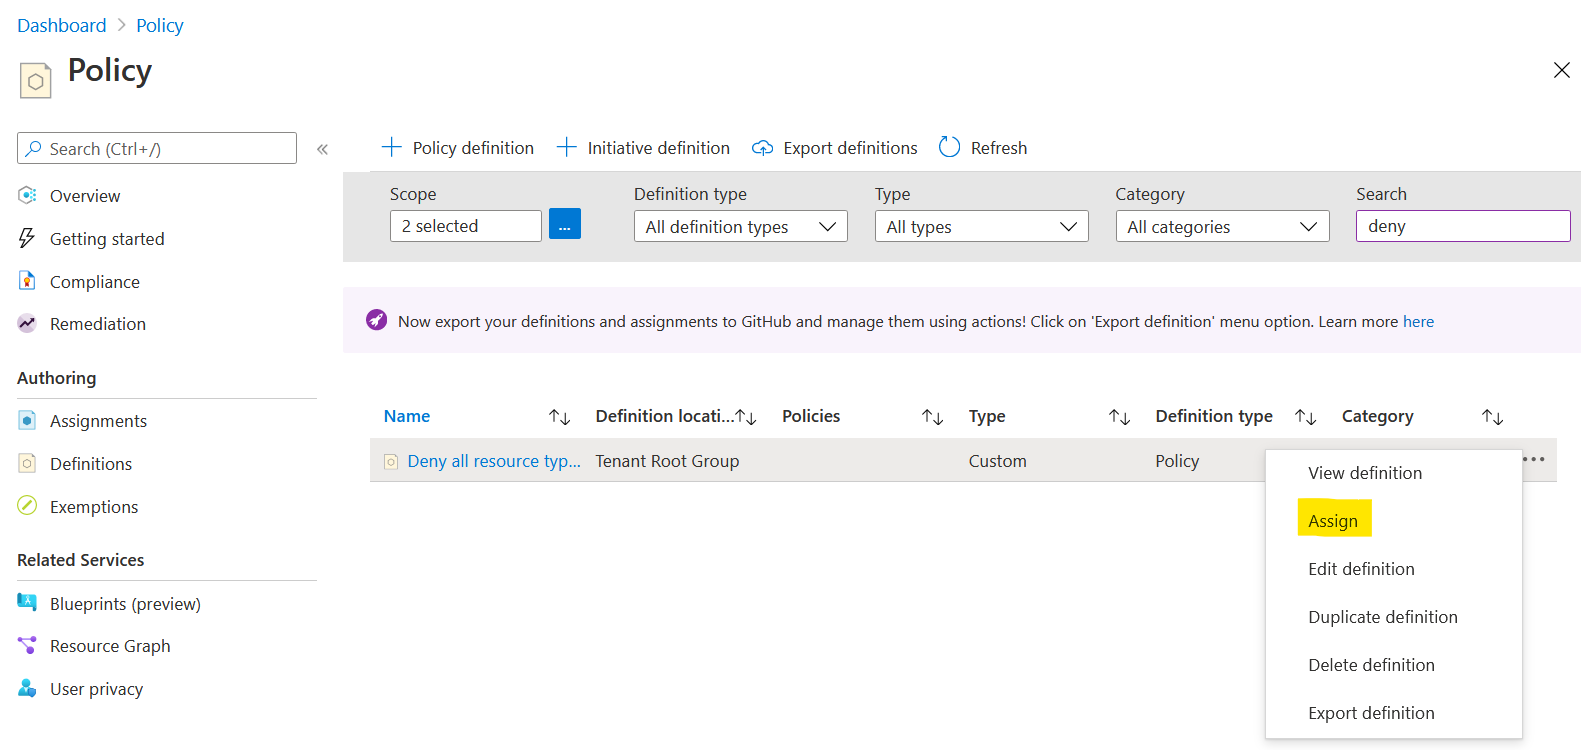
The final step is to assign the policy. This can be done by clicking on the ellipses next to the new deny all policy definition and selecting assign.
Now that the policy is assigned, any attempt to create a resource will get denied, as the following example shows.


Hi Richard ,
Thanks for this wonderful article.
May I know how I can associate it with Azure Budget alert.
That once the budget has been reached, the policy gets assigned on that subscription only and once the budget is under control, the policy will be removed from the subscription.
Thanks!
LikeLike
Hi Gaurav,
If you’re still looking for a solution to your question, try using an automation runbook for orchestrated responses to budget alerts. I’m not sure if Azure Policy can be tied to it, but here’s an article that explains the approach. https://learn.microsoft.com/en-us/azure/cost-management-billing/manage/cost-management-budget-scenario
LikeLike